![]()
PageBuilder Master Layout
A Master Layout is a special type of PageBuilder template that may include a special kind of dropzone called aMaster Zone. A Master Zone is only editable by users assigned to the Administrators group or the MasterLayout-Create role. All other dropzones on a Master Layout template are called Layout Zones. Anyone can edit them.
An example use of this template is: a department head reserves one Master Zone on his department pages for his content. Only the department head may edit the Master Zone. Content authors may drag and drop widgets into other dropzones, but cannot edit the Master Zone.
How a Master Layout works
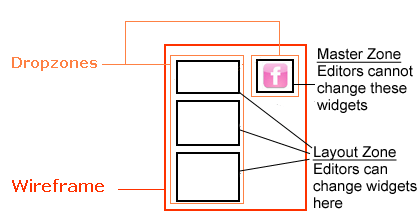
The following diagram shows a Master Layout template that contains two dropzones and four widgets. In the example below, the Master Zone contains a Flckr widget.
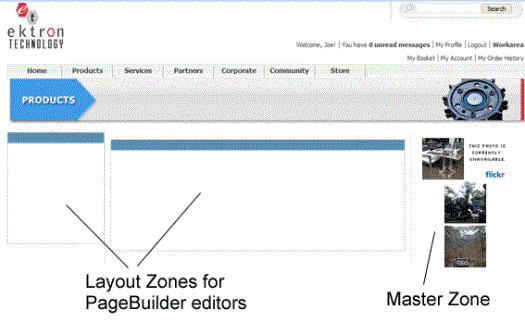
Once a Master Layout is published, it can be used like any other template. The following figure shows a sample page that uses a Master Layout.
Creating a Master Layout Page
In the previous topics about Acme Books, Pete created a wireframe with two dropzones, both of which are editable by Pierre and his marketing team. Now, Pierre wants to create pages with one dropzone in the upper right corner, which the marketing team may not edit. In this zone, he wants to place the Flickr widget on all pages. In the other zone, the marketing team can drop any widget.
Since Pierre has been assigned the MasterCreate-Layout role in the CMS, he follows these steps to create the Master Layout.
1. In the Workarea > Content folder, create a new folder called Master Layouts.
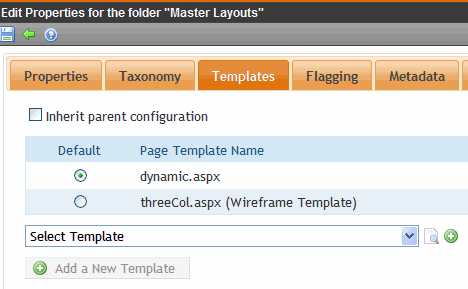
2. In the Template tab, uncheck Inherit parent configuration. Then, select a wireframe template that shows in the list of templates.
3. Click Add (![]() ) next to the Select field.
) next to the Select field.
4. Click the radio button next to the template selected in Step 2 to make it the folder's default template.
In the example below, he chooses "threeCol.aspx (Wireframe Template)" from the list.
5. Click Update ( ) to add the template to the folder.
6. Click the Master Layouts folder.
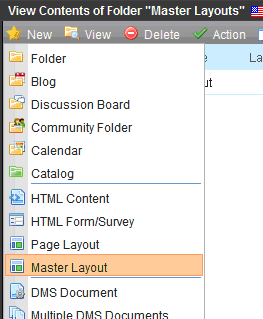
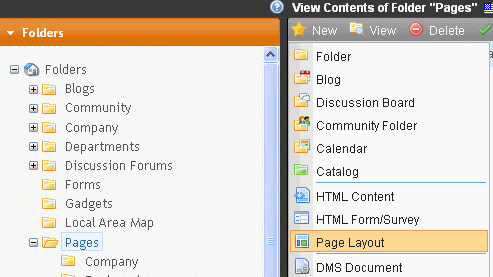
7. Select New > Master Layout, as shown below.
8. Set the title to MasterLayout1.
9. Click Next.
.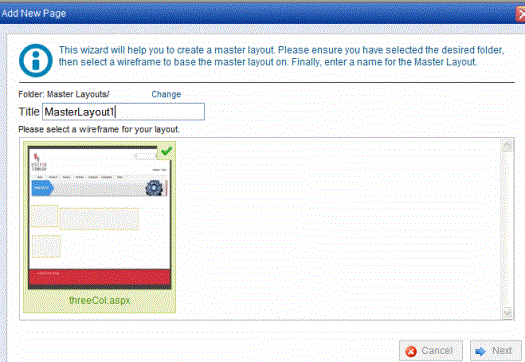
10. Select the wireframe that you wish to use for this layout. It is highlighted green when chosen.
11. Click Next.
12. Set Metadata, Summary, and Taxonomy Categories if desired.
13. Click Finish.
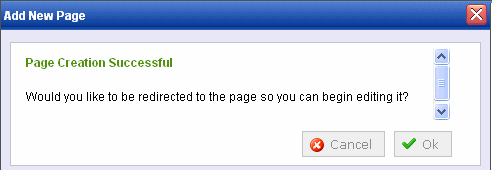
14. You see Page Creation Successful.
15. Click OK to continue editing.
Setting a Dropzone to a Master Zone type
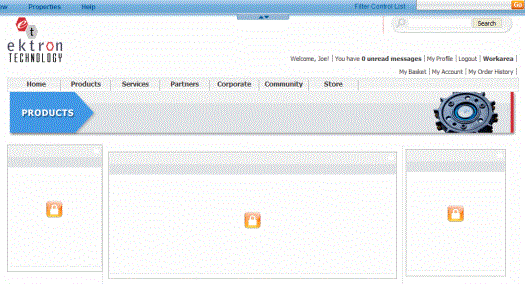
After the wizard finishes, you see a new Master Layout page with dropzones that can be used for Master Layout areas. You must unlock a dropzone to convert it to a Master Zone. The following figure shows a Master Layout with three dropzones.
In the steps below, we change one dropzone to a Master Zone.
Changing a DropZone Type to Master Zone
1. Click Lock ( ) to change a dropzone from Layout Zone to Master Zone.
2. The following warning appears. Click OK.

Warning! Unlocking this dropzone deletes columns and widgets that are on templates based on this master layout. Click OK to unlock this dropzone.
3. The lock disappears, indicating a Master Zone.
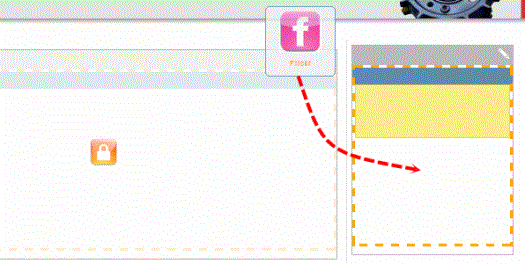
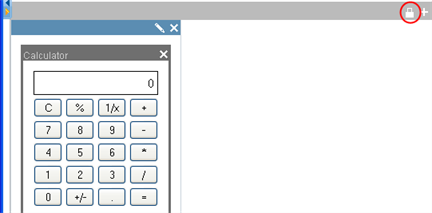
4. Drag and drop appropriate widgets into the Master Zone. The figure below illustrates dropping a Flickr widget.
5. On the PageBuilder Menu, select File > Publish.
Pierre now has a PageBuilder Master Layout that contains three dropzones. PageBuilder pages using this template have two zones that may be edited, plus one zone containing the Flickr widget that cannot be edited by unauthorized users.
Assign a Master Layout to the Pages Folder
Before Pierre's group can create new PageBuilder pages based on the Master Layout, it must be added to the templates available to the Pages folder. To do this, he follows these steps.
1. In the Workarea, click the Pages folder.
2. Select the menu View > Properties.
3. Click Edit ( ).
).
4. Click the Templates tab.
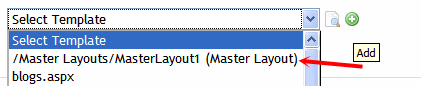
5. Select the Master Layout. In the following example, it is called /Master Layouts/MasterLayout1
6. Click Add ( ) to add it to the template list.
7. Click Update ().
Using a Master Layout to Create a New Page
Now that Pierre has created the Master Layout page and assigned it to the Pages folder, he instructs his team to use it for their PageBuilder pages.
To do this, they follow these steps.
1. In the Workarea, click the Pages folder.
2. Click New > Page Layout.
3. The Add New Page screen appears.
4. Select the new Master Layout as shown below.

5. Click Next.
6. Complete the settings for Title, Taxonomy, and Aliasing.
7. Click Next.
8. Enter Metadata and a Summary.
9. Click Finish.
10. The following message appears. Press OK.
Widgets can now be placed in the PageBuilder page's Layout Zones. The Master Zone is the same on each new PageBuilder page, and may not be edited.
Changing a Master Zone to a Layout Zone
Note: To make this change, you must be a member of the Administrators group or have the role of or MasterLayout-Create.
At some point, you may want to convert a Master Zone back to a Layout zone. To do this, follow these steps.
1. Access the Master Layout page that you want to edit.
2. Click Edit Page.
3. Click Lock ( ) (circled below) to change the dropzone type from Master Zone to Layout Zone.
4. The following warning pops up. Click OK to continue.
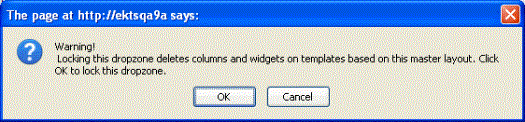
Warning! Locking this dropzone deletes columns and widgets in the master zone, and affects all templates based on this Master Layout.
5. The Master Zone now appears Locked. PageBuilder editors can use this Layout Zone for widgets on PageBuilder pages derived from this Master Layout.


![]()